From Baby Room to Big Girl Room


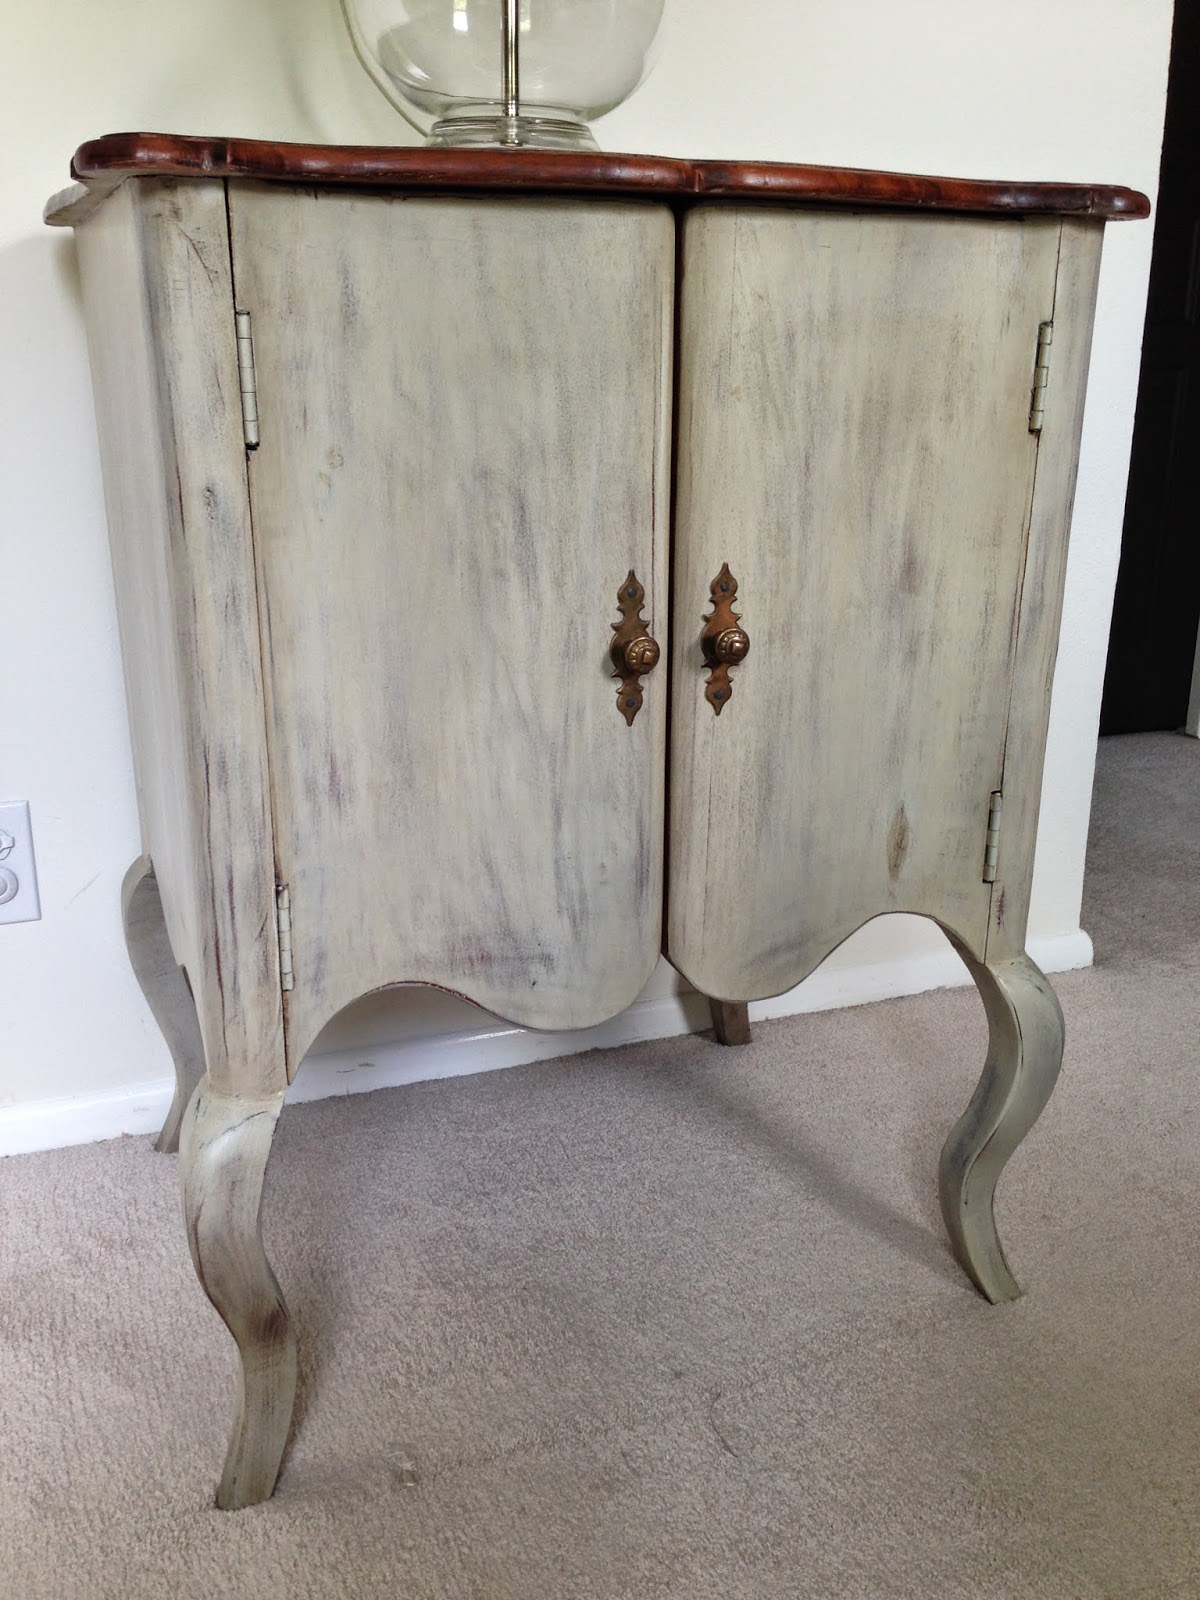

You might remember this adorable custom art I made for Alice’s nursery. This is staying, where it is actually. I’m pulling a small light greenish painted dresser from our guest room, that belonged to Frank’s grandmother, and putting it under this art for her dresser. I’m only going to change up the hardware on this piece.
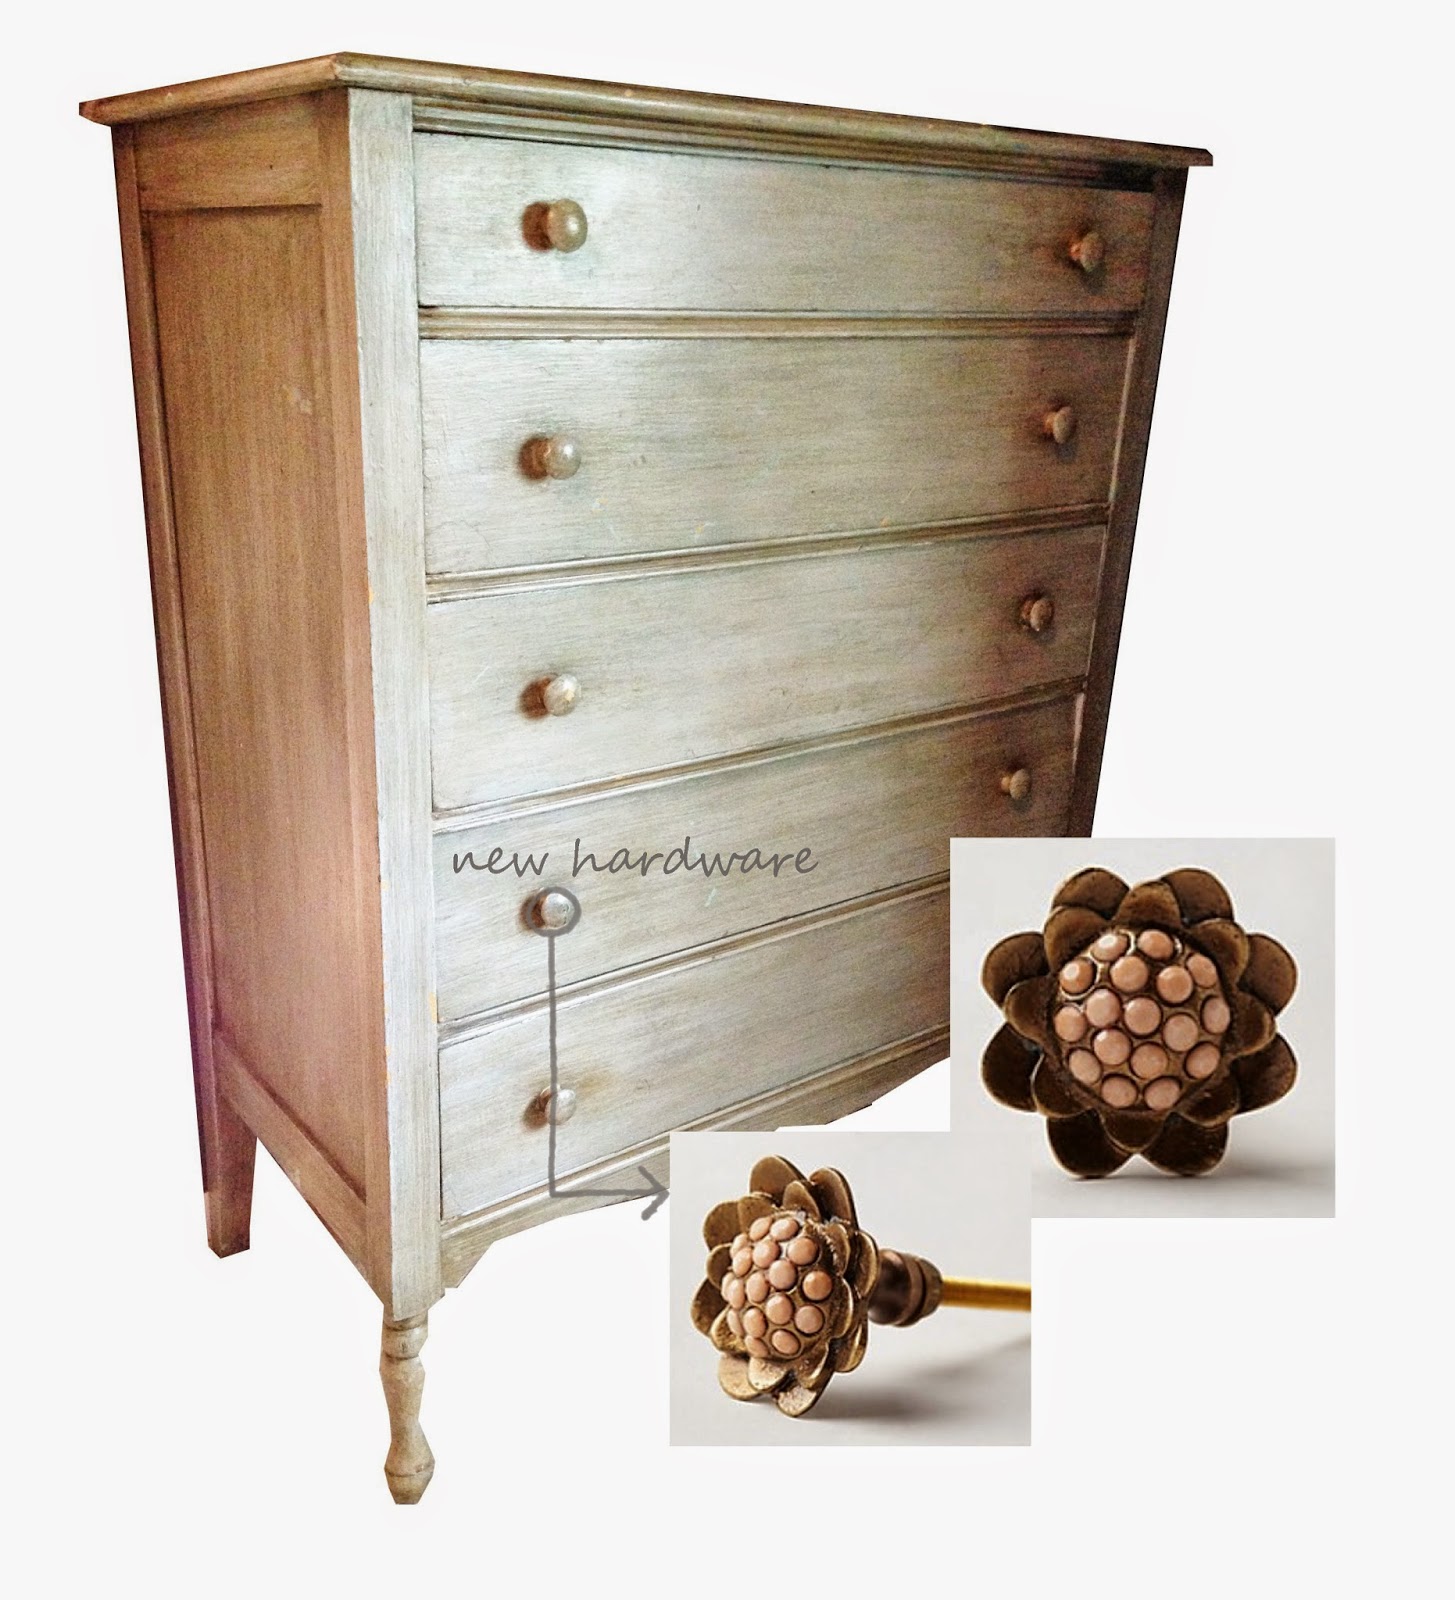
So this is where I’m at so far.
I’ve got a lot to pull together still with the rest of her art etc. but I’m liking the direction and what I have completed so far.
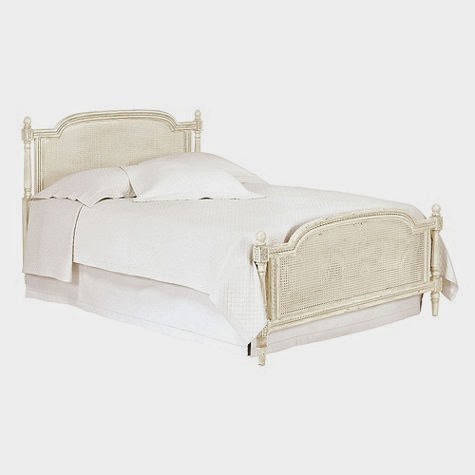
She’s getting very excited about her big girl bed, so that is making this even more fun. The bed is just leaning up against the wall in her room right now waiting to be put together and we talk about how fun it’s going to be to sleep in her big girl bed soon. I love that little Bunny fiercely!
I’ll be back soon with more from our ‘babymoon’ 🙂
I hope you’re getting a great start to the week!
Visit FreeRealtyOnline.com to list your home for sale by owner!
Beautiful DIY Pottery Barn Inspired Mirror!

I’ve loved this Pottery Barn mirror for years but at $699 it’s overpriced and the wrong color. There are numerous tutorials to DIY your own mirror but they seemed a little too complicated aka they had math involved and I don’t have the patience for measurements. I also have an irrational fear that I might lob off a finger messing around with a circular saw so those tutorials weren’t for me. Nope, definitely not for me, I love my fingers.
Then, I saw this tutorial using Dollar Store mirrors and I figured, why not try it? Even if it was a epic fail I wouldn’t blow a lot of money.
I didn’t follow all the instructions in the link above because I wanted a much bigger mirror and needed a more sturdy and stable backing.
I started with 25 of these mirrors from the dollar store. They’re really cheap looking with a plastic frame and they come in black, brown and I believe red.

I painted the frames with Martha Stewart gold craft paint

Since the mirror would have some weight to it and I wanted to hang it, I purchased this kit from Michaels for less than $5 to use.

I also purchased a sheet of 5 MM plywood and had it cut the Home Depot for $15. (no circular saw for me). I screwed the hanging hook into wood on either side and I did pull my level out to make sure they lined up together. The piece of plywood I used measured 43 x 54 3/8.

I made sure the mirrors hung over wood by about 1/4 of the inch on all sides and just lined them up by eye balling them and glued them down using E-6000.

Here’s the final product. Isn’t it pretty? I only had one mishap when I pressed down too hard on one of the mirrors over the hanging screws and it broke so be careful when pressing down over that area if you are going to try this project. Other than that mishap, it was an easy, peasy project than gives a great impact.

Here’s a sneak peak of how it looks in my room. I’m finally on track to finish the room after a gazillion years. Yeahhh!!!
Linking this to Thrifty Decor Chick
Visit FreeRealtyOnline.com to list your home for sale by owner!
Beautiful DIY Dip-Dyed Vase!

Dip dyed anything is still going strong and decided I’d join the party and try it myself.
Today I’m sharing a super easy DIY brought to you by Glidden® paint.
By partially painting, it’s a great way to give an existing vase or vessel an extra layer of depth and more interest. I wanted to go bold and went with Glidden paint – onyx black, a perfect contrast against the antique brass color of the vase.

things you need: any existing vase or vessel, Glidden paint, pencil, paint brush, ruler, tape.
Step one: with pencil and ruler, mark how high you’d like your paint line to go. Make mark with pencil and repeat all around.

Step two: use tape to connect each pencil mark.
Step three: with paint brush, paint entire portion below the tape line.
Step four: wait at least an hour to dry before applying another coat of Glidden paint.
Step five: peel tape and fill with pretty flowers.

I’m not much of a DIY-er but Glidden paint made it super easy to take some inspiration and create something on trend, a quick dramatic difference for something I already had.
Plus, with their simplified palette, I wasn’t overwhelmed by the plethora of color options which made my decision less time consuming.
disclosure: this post was sponsored by Glidden paint through their partnership with POPSUGAR select.
While I was compensated to write a post about Glidden paint, all opinions are my own.
Happy Monday!
The post DIY with Glidden Paint appeared first on designstiles.
Visit FreeRealtyOnline.com to list your home for sale by owner!
Backyard Wedding Charm


Monday, marked two whole months of marriage for Stephane and I. It’s crazy how quickly time passes by, it feels like last week! Yesterday I shared our backyard and how far it’s come over the past few years. Today I want to give you a little peek into how that same backyard was transformed as the site of our wedding this summer. And a few other details of the day too!.
Since the day we got engaged, Steph and I knew that we wanted our wedding to be simple and intimate. We even considered eloping but ultimately, I knew I wanted my mom and dad to be there. We decided to keep it small and host it right at home in our backyard. On a Wednesday night, with a raindate! (That luckily we didn’t have to use:) We had a total of 40 people which included only our immediate family and our closest friends.
The plan was to always remember three words: simple, intimate and relaxed. Throughout the planning and decision making process I tried to keep that in mind. I knew that sometimes things can snowball and that the world of Pinterest would tell me that things were to be done a certain way. We really wanted it to feel more like a backyard cocktail party than a traditional wedding.


We spent the morning of the wedding helping with the set up. My sister and I made flower arrangements with flowers from the garden mixed with lots of greenery provided by our florist. Steph made sure the yard looked good and helped set up all the linens, glassware, dishes etc. I’m sure some would think we were crazy for being so hands on the day of but I wanted to be part of the process. I love that stuff and couldn’t have imagined leaving it to someone else.
After heading out to have my hair and makeup done, we both got dressed together at home. I even helped him tie his tie and decide which shirt to wear. When he left with one of our photographers, I slipped into my dress (had to have at least one secret!) and then left with our other photographer to meet him for our “first look”.


I think one of my favorite parts of the wedding was the very beginning. With all of our couple and family photos out of the way, we headed back to the house and were able to greet all our guests as they arrived. It was so nice to hug them and and welcome them all with the excitement of the ceremony looming. I didn’t walk down an aisle but rather, when we felt everyone had arrived and had a drink in hand, we asked them to gather around the tree and the ceremony started.

The ceremony was very personal. We said our vows and had my dad and Stephane’s daughter each do a reading. Steph’s father passed away a few years ago and we were able to use his wedding ring which was pretty special. Our mothers were our witnesses.

After the ceremony, it was time to eat! My best friend Emily is a chef and she did all the catering for the wedding. I cannot thank her enough! She had it all prepared beforehand and we hired two people, including an oyster shucker, to handle it all throughout the evening so that she could kickback and enjoy herself.
For us, it was a highlight. Emily even surprised us with homemade lavender citrus ice cream and waffle cones as a late night snack. Everyone is still raving about how good the food was!


I kept most of the decor to a minimum. As much as I love a wedding abundant in details and decor, I wanted our own event to be simple and not overdone. I stuck with lots candlelight, string lights and greenery/flowers.. with a little bit of geometric thrown in!

Our florist was a gem. I’ve worked with Michael on many other projects and I knew he understood my style. I wanted a bouquet of various greens with possibly some white flowers thrown in. Otherwise, I didn’t give any other direction than that. I also wanted as much loose greenery as I could get to use in flower arrangements and as little details throughout. He knocked it out of the park. Not only did I love my flowers but the smell of eucalyptus and rosemary throughout our house lasted for days!


Visit FreeRealtyOnline.com to list your home for sale by owner!
Bathroom Decor Inspiration

You guys may remember our little downstairs bathroom. We actually started working on it last year and well we are finally adding all the finishing touches. One of my favorite additions is our AXOR Montreux bathroom faucet.

I love the detailing of the design with the single lever and pop up waste set. Its the perfect addition to our little bathroom. AXOR is a leader in bathroom design. They have so many gorgeous product lines and all so ingenious in the design.
I’m always so happy when I find a company that not only makes beautiful products but also has great functionality to go with it. Their faucets come in a array of designs and finishes. I chose the Montreux in the brushed brass finish with matching drain set.


We are so happy with our Montreux faucet. I know we have chosen something beautiful, functional and of excellent quality for our home. If you love the AXOR Montreux just as much as I do, check out the AXOR site here to see their wide array of products. You won’t be disappointed!
Visit FreeRealtyOnline.com to list your home for sale by owner!
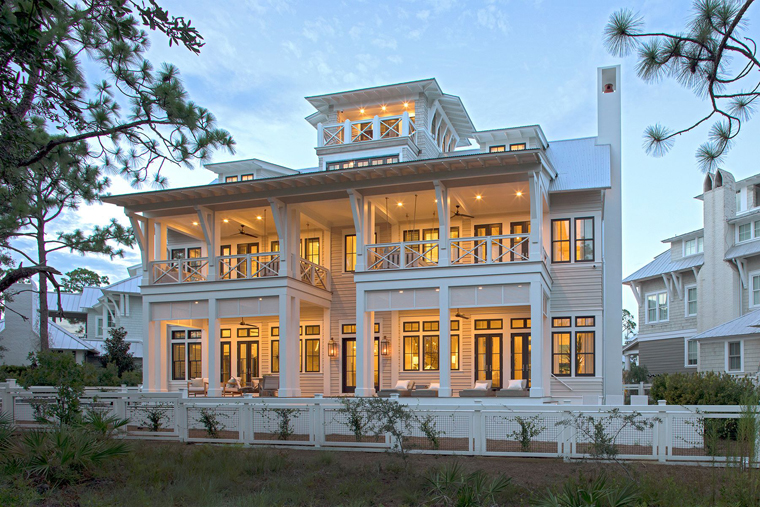
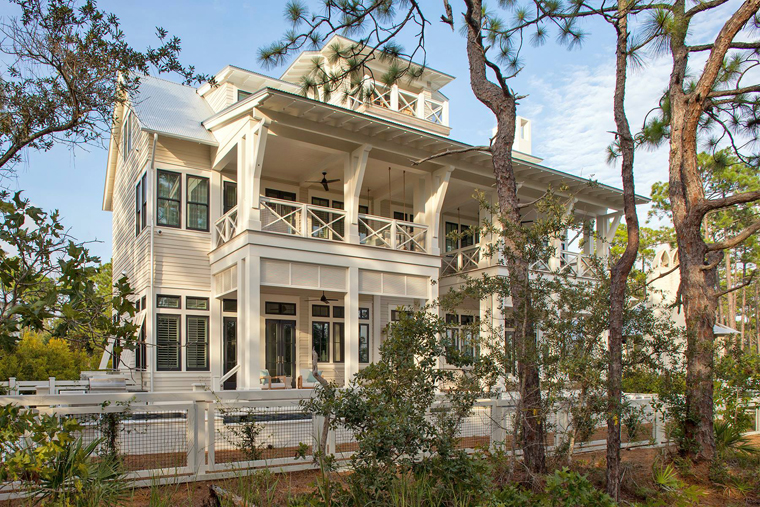
I’m DROOLING Over This Home… Are You?

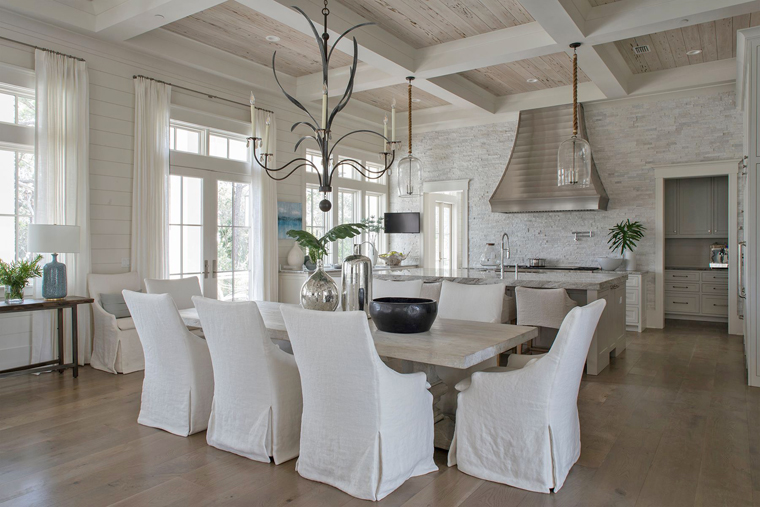
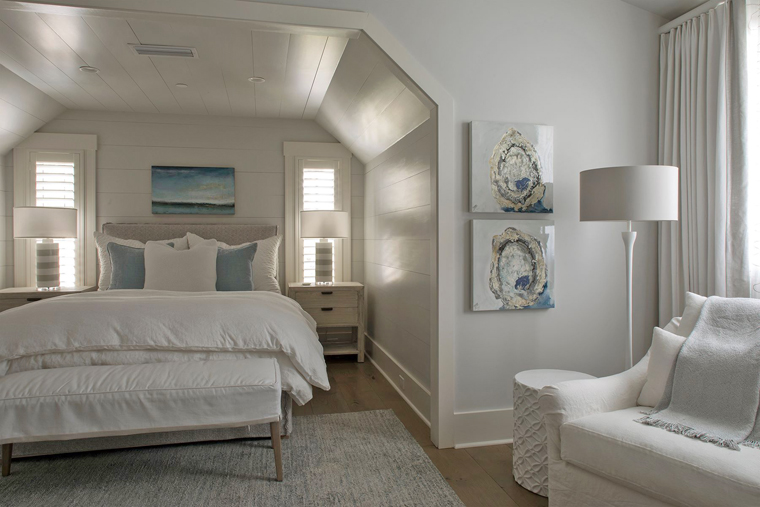
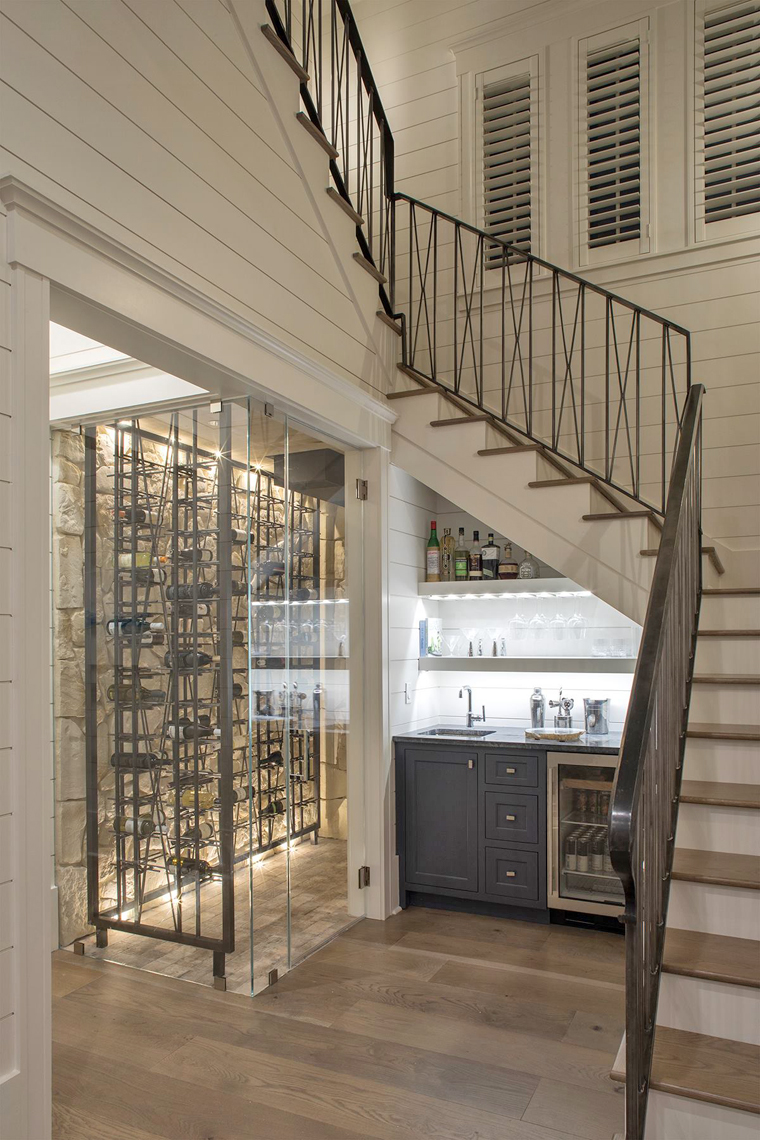
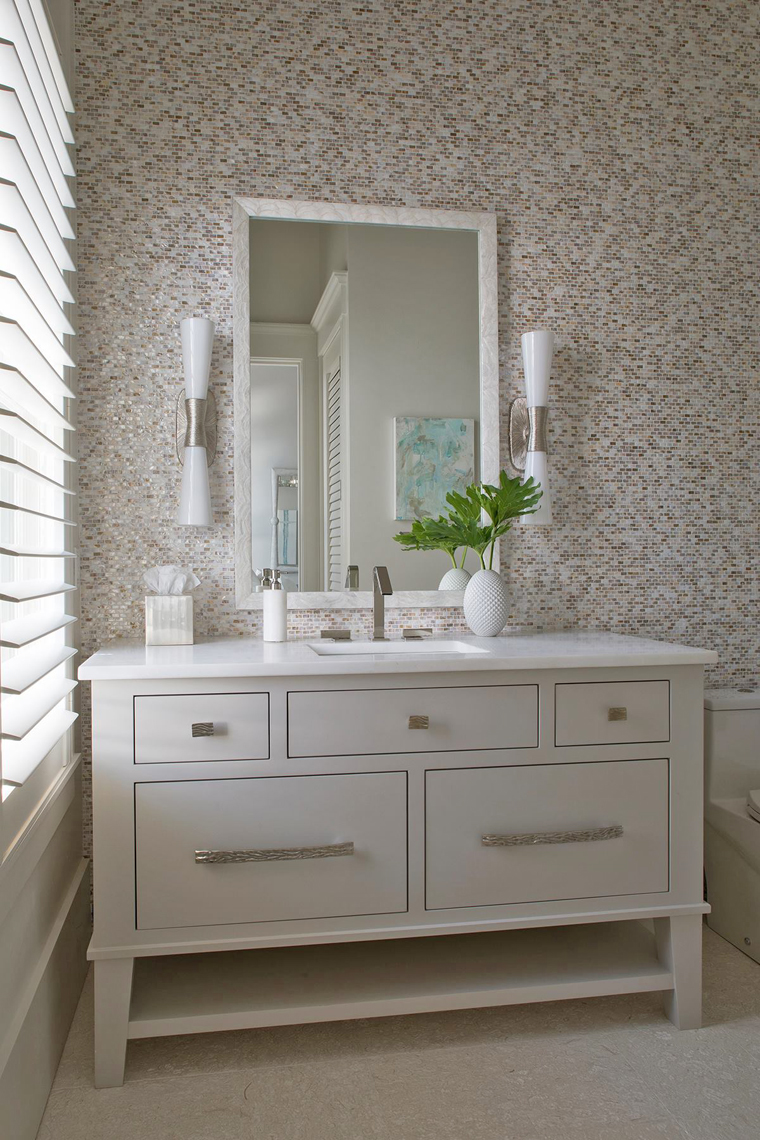
I promise you guys I am NOT done blogging!! This pregnancy has just been taking its toll on me–thankfully I only have 10 weeks or so left to go! Cannot wait! And I cannot wait for you guys to see the Geoff Chick masterpiece I have for you today. It’s easy to see why this architect is one of the most well-respected along 30A in Florida…not to mention one of my own personal favorites! I’ve yet to see a home he’s designed that hasn’t blown me away. Geoff Chick worked with builder Chris Clark Construction and Atlanta-based interior designers Robyn Prince & Marianne Temple (the same dream team behind one of my all-time favorite homes here) to craft this elegant yet inviting WaterColor beach home filled with incredible architectural details, stunning craftsmanship, and an airy coastal vibe I adore. Sit back and enjoy these beautiful photos by photographer Jack Gardner!
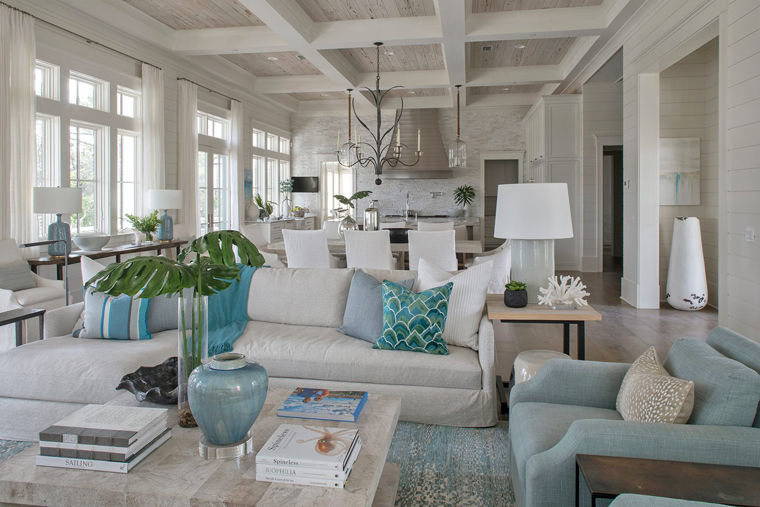
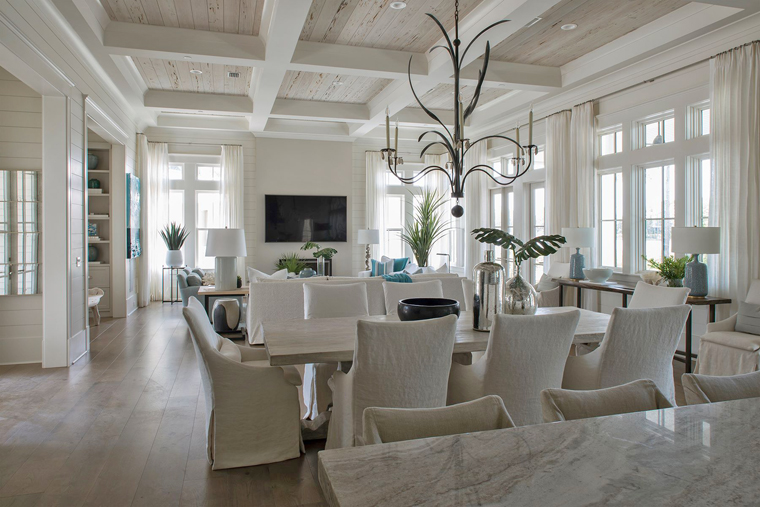
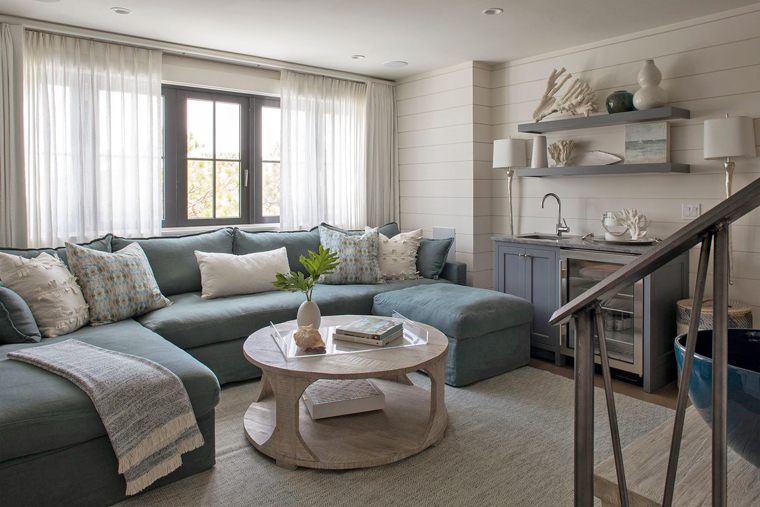
I’m loving the splashes of blue and turquoise that accent the predominately neutral home.
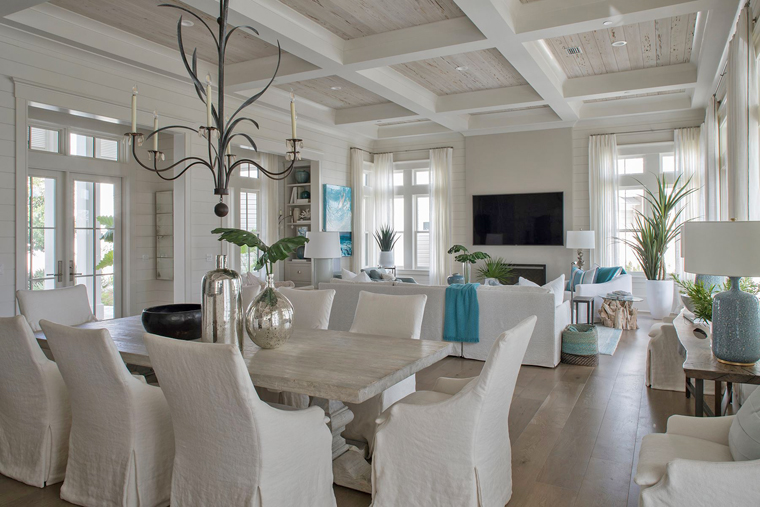
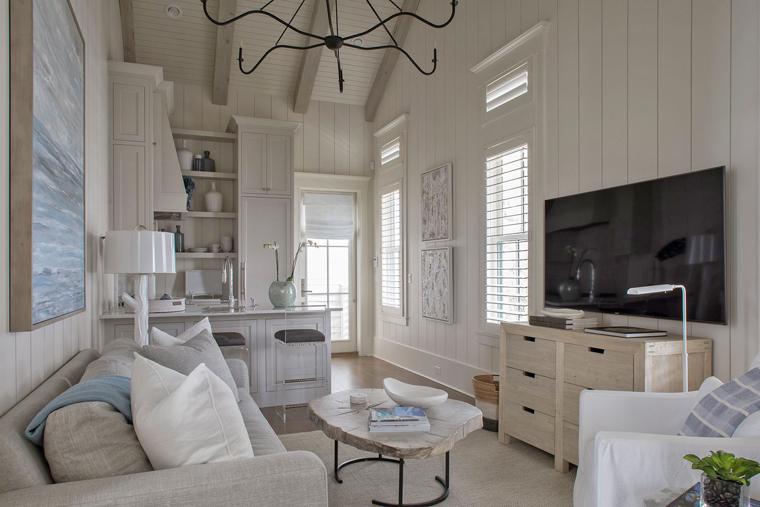
So many striking details in the open-concept living area…the coffered ceiling is especially gorgeous!
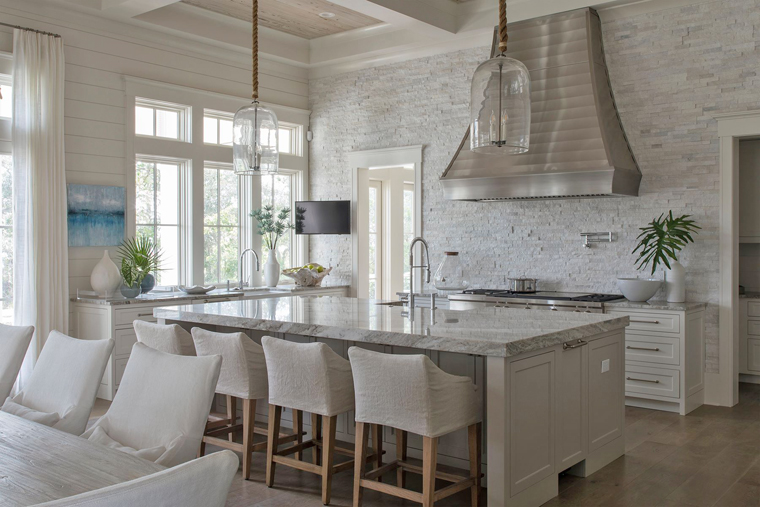
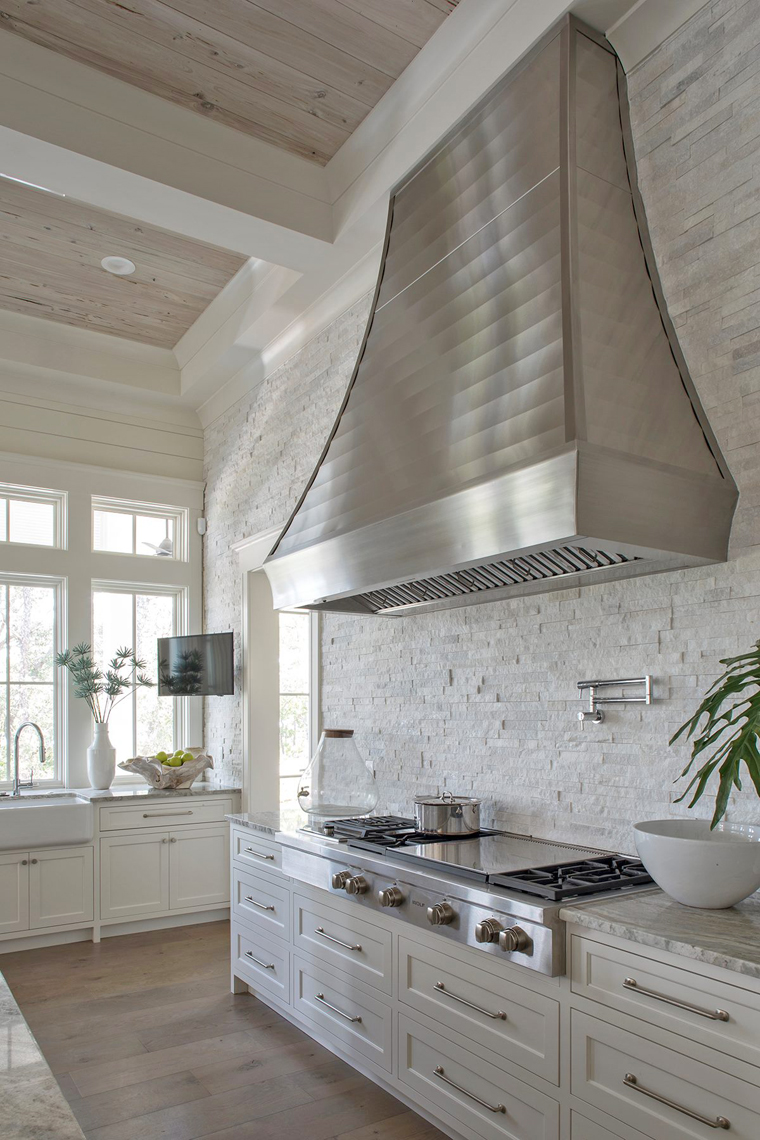
Perfect proportions are paired with beautiful textures in the gourmet kitchen. Check out the custom-built stainless steel hood!
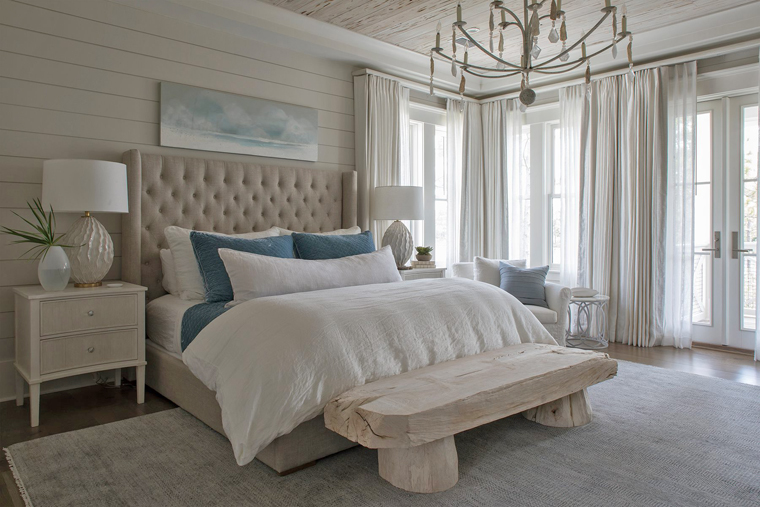
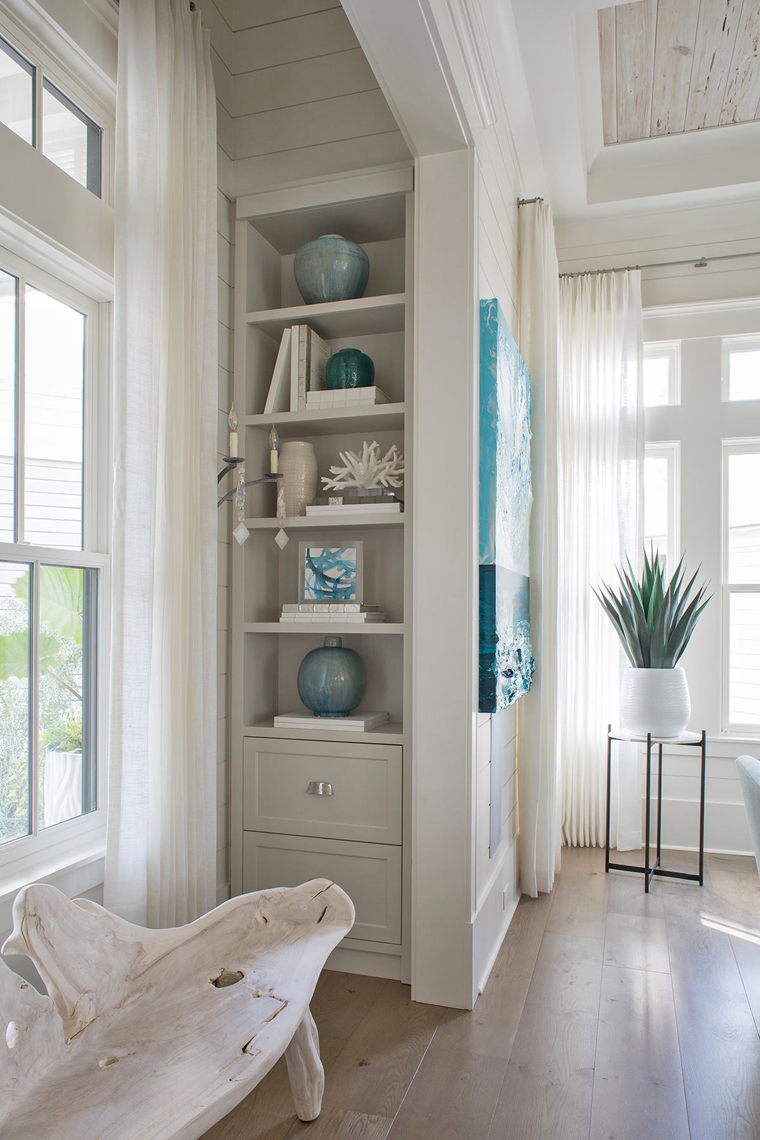
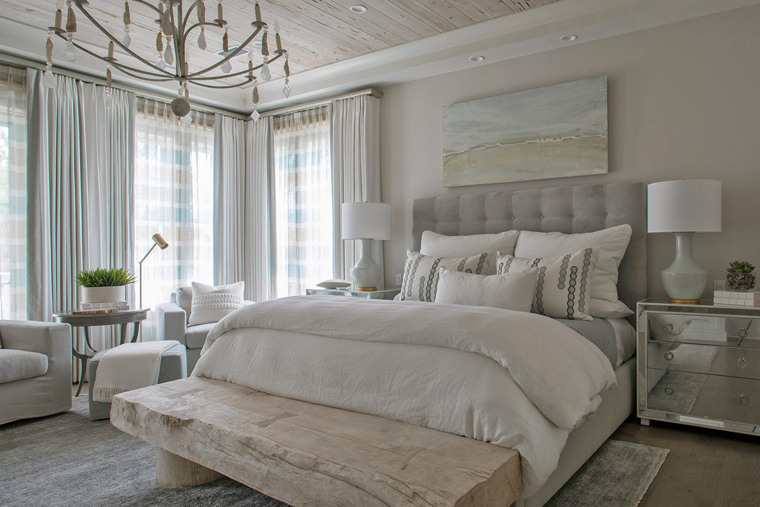
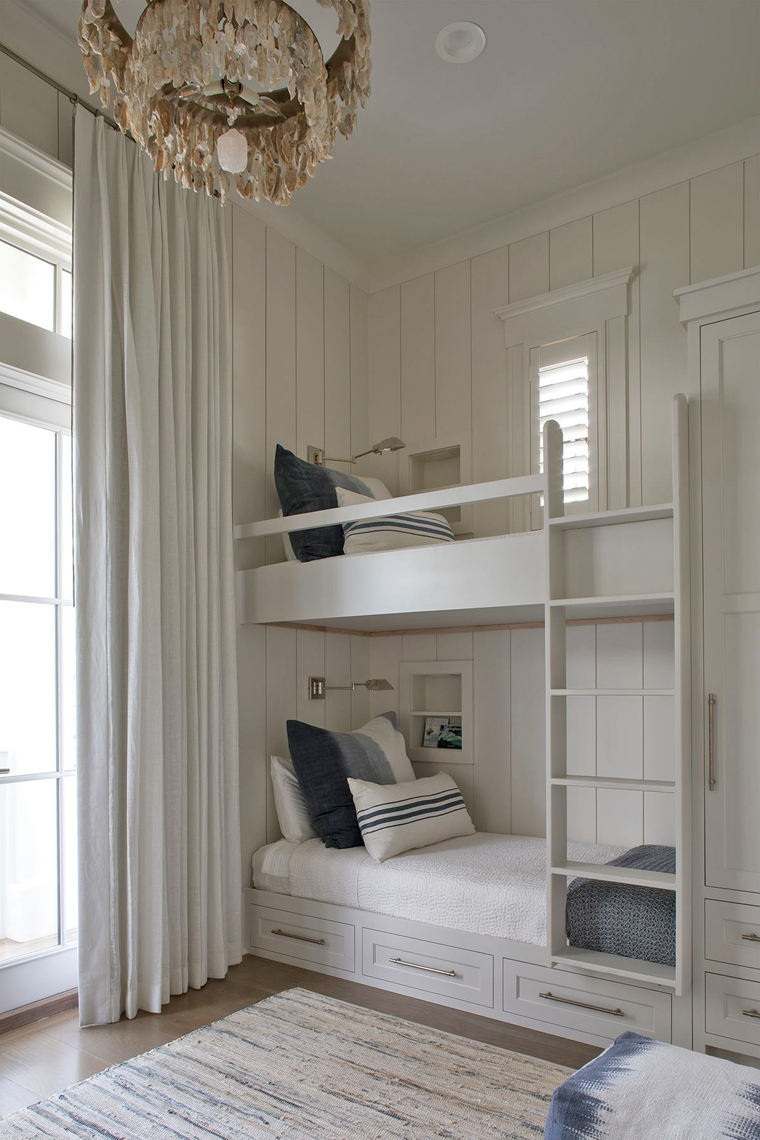
Like the rest of the home, the bedrooms are filled with relaxing natural and neutral tones with touches of blue.
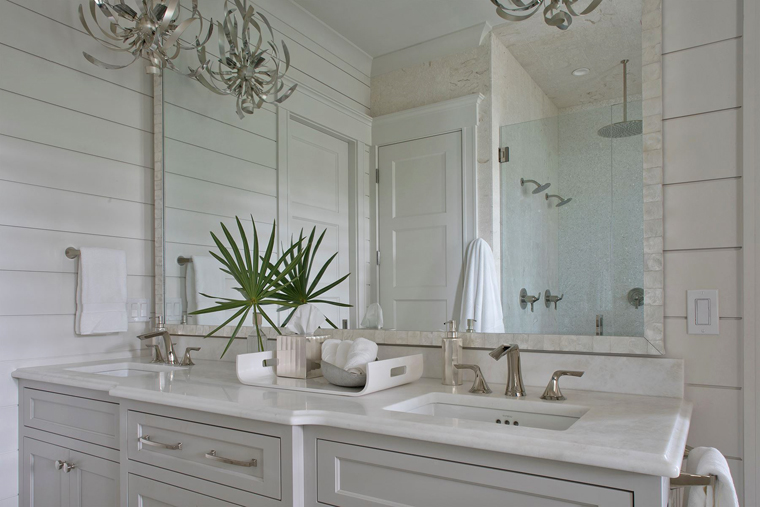
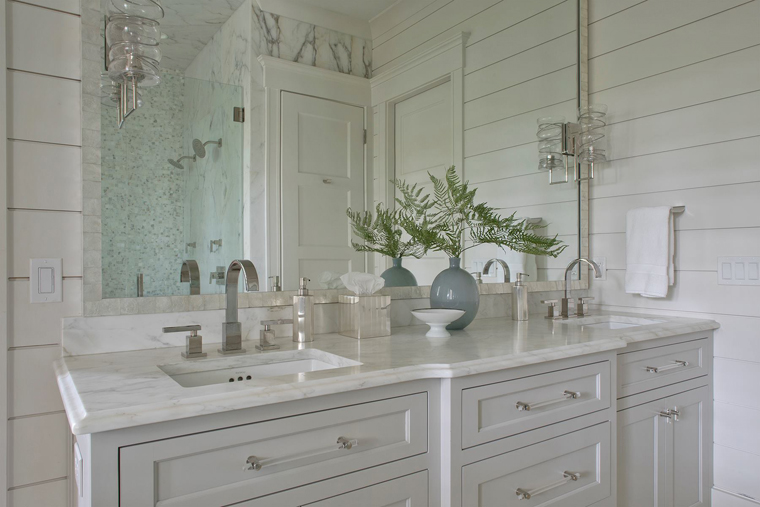
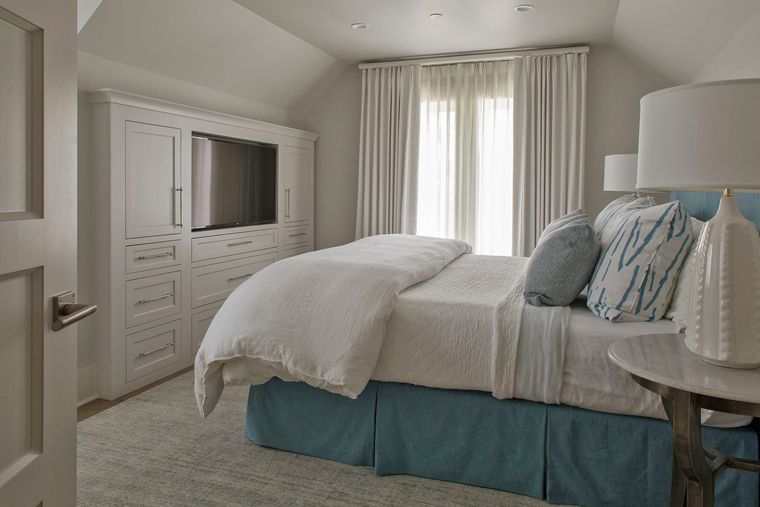
So many great custom built-in details around every corner.
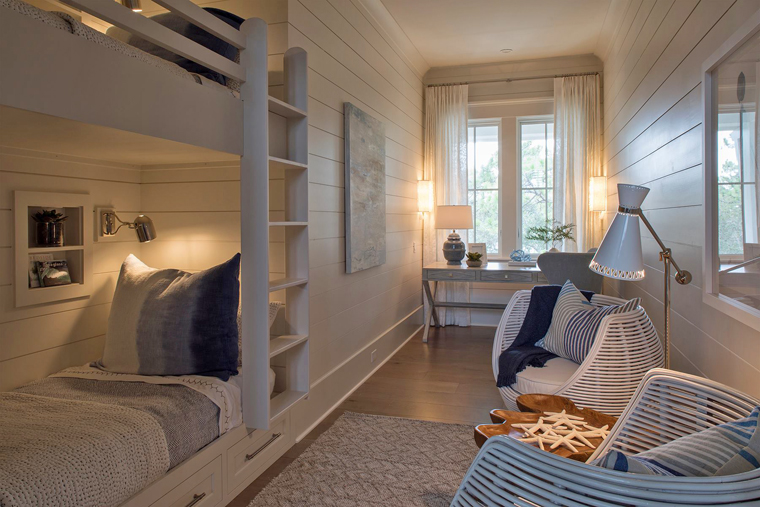
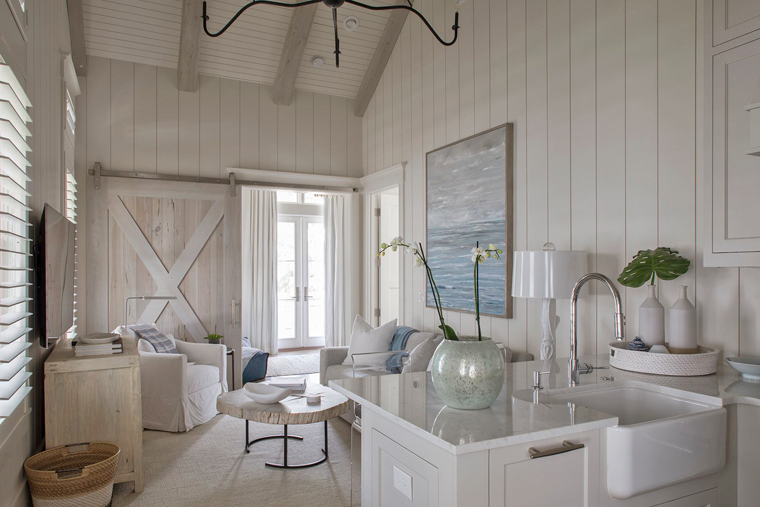
Who wouldn’t love to be a guest in this dreamy carriage house?!

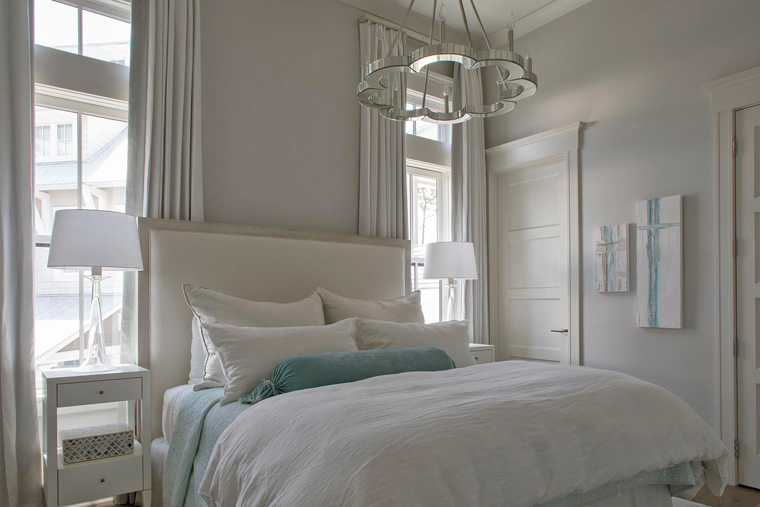
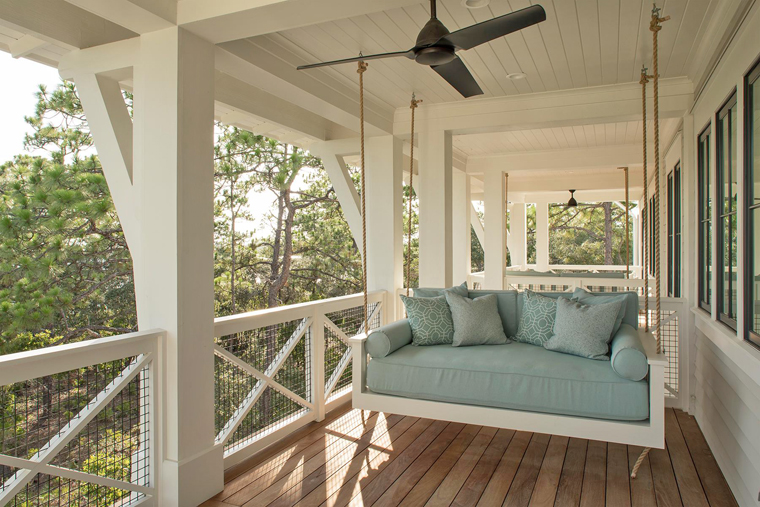
The two master suites on the second level each have their own private balcony. What a dream!
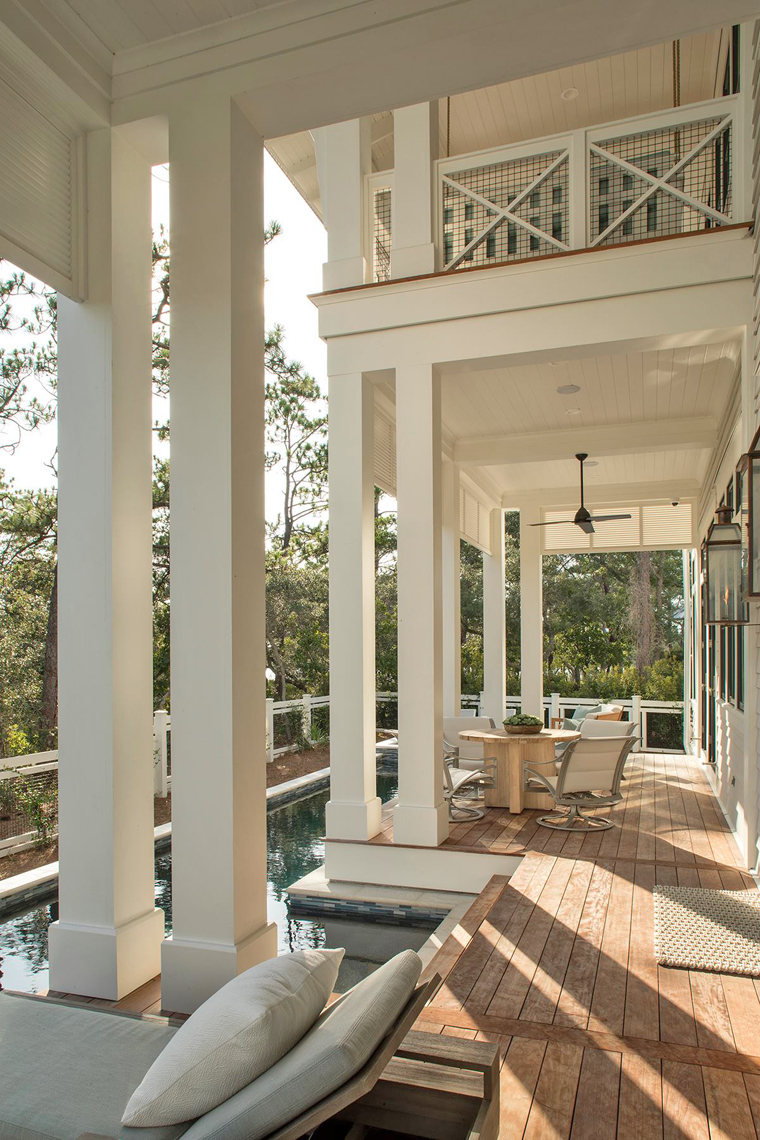

Not to mention the view….

…and 75 foot lap pool!
Amazing, right?! To see many more incredible projects by Geoff Chick & Associates, be sure to check out their Facebook page and follow them on Instagram. And for more turquoise-filled projects I’ve featured by this talented architect, go here!
Recent Turquoise Finds:
!function(d,s,id){var e, p = /^http:/.test(d.location) ? ‘http’ : ‘https’;if(!d.getElementById(id)) {e = d.createElement(s);e.id = id;e.src = p + ‘://’ + ‘widgets.rewardstyle.com’ + ‘/js/shopthepost.js’;d.body.appendChild(e);}if(typeof window.__stp === ‘object’) if(d.readyState === ‘complete’) {window.__stp.init();}}(document, ‘script’, ‘shopthepost-script’);
 JavaScript is currently disabled in this browser. Reactivate it to view this content.
Love turquoise? Visit my shopping blog Everything Turquoise…updated several times throughout the day! Check out Decor by Color for even more color-themed shopping!


Visit FreeRealtyOnline.com to list your home for sale by owner!
one room challenge week 2: the plan

week 2 of the one room challenge is underway. i am making some progress on decisions.
now that i have committed to getting this area done in the next few weeks, i have been getting nervous about getting the cabinets made and installed. no kidding—i have emailed my cabinet fabricator 4 times in the last 5 days. i think he gets the hint that i am READY for those drawings.
i still don’t have them yet, and i feel like i am sprouting grey hairs waiting around…
anyway.
here is the design plan for the area:
i love to pull together these plans for clients, and always make one for rooms i am designing in my own home. for me, having a visual guide for a room helps me finalize finishing touches, and motivates me to complete the project!
the mudroom PLAN:
*add a seating/storage built-in (the longer leather pulls will be installed on the lower drawers, and the leather pulls will be on the upper cabinets)
*add planking. i am considering a “random” look to the panels.
*adding grasscloth to the ceiling. i scored some ralph lauren herringbone grasscloth wallpaper about year ago on ebay, and i am hoping i have enough!
* adding some art. still up in the air about size, style, color…
*adding shelling to the closet, along with the bird wallpaper. i have been in love with that wallpaper for a while, and i like the idea of getting a little rush of happiness when i open that cam closet.
laundry room PLAN:
*add cabinets with some great hardware
*add counter. i am hoping to find a rem ant of a black veined marble, but i will settle for some honed absolute black granite.
*install a backsplash. this might be one of the items that doesn’t happen happen due to time and money.
*add a roman shade
*install some trim to the ceiling in an “x” detail
*get a new light.
if anyone want my cabinet guys email, so that you TOO can bug him about getting those drawings to me, let me know! he might need a little more email motivation! ha! i’m only kidding. (or AM i?)
you can see pictures of the space in my week 1 post here

Visit FreeRealtyOnline.com to list your home for sale by owner!
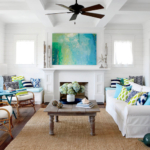
Make Your Room Pop with Fun, New Pillows
The “new” living room is coming together piece by piece – and I’m loving it so far. I had to share the fun pillows I ordered on Etsy.
These arrived yesterday and I’m in love. I didn’t realize when I ordered them that the design is actually hand stamped onto the fabric. Gorgeous! Here’s a link to the seller’s shop.
And these pillows are being custom made for me by this seller (which is a fancy way of saying I was too lazy to make them myself). I can’t wait to see them in person!!!

Also, the new rug is in it’s place in my living room and I love it. This is where I should insert a real life photo of said rug in said living room…but I’ll let you wait for that and instead post the Urban Outfitter’s stock photo. Yes…I’m truly that lazy right now…or more accurately, I truly am that busy. You should see the dishes in my sink… Sorry loves.

I’ll keep you posted on the progress!
![]()
Visit FreeRealtyOnline.com to list your home for sale by owner!
Our House in East Coast Living!

It was an exciting summer for the Modern Jane household. Not only did Stephane and I get married in our backyard but we also had our house photographed for a magazine. It made for a busy summer all around but seeing it in print made it all worth it.

Janice, the editor for East Coast Living contacted me in the spring. They were looking to feature a diy property. Seeing as Steph and I did the majority of the work renovating our home ourselves, she wondered if we’d be interested in participating. Of course we were flattered but wondered it we measured up to some of the gorgeous properties that have been previously featured. (Including our good friends modern home in Charlottetown!) We decided to go for it and it was an awesome experience.
You can check out the article online here and if you’re in the East Coast of Canada, you can pick up a print copy, which includes a few more photos.
I’ve been asked about about things that are mentioned in the article that don’t have a picture so here are a few links, if you’re interested.
- dining room wall hanging
- living room black & white photograph
- bathroom renovation
I blogged two days in a row.. I’m on a roll!


Visit FreeRealtyOnline.com to list your home for sale by owner!
Backyard Living

A few years ago, Stephane and I totally revamped our backyard space. What was originally a blank canvas with one lone tree in the middle of the yard and a tired looking shed in the corner, became a private little oasis for us to relax in.
Over the course of two summers, we build a deck around the tree and connected it both to the house and the entrance to the backyard with wooden walkways. The deck was surrounded with load upon load of pea stone and we planted lots of lush grasses, succulents and shrubs. We also built a modern style fence to close in the yard which gave Beaufort the freedom to run around freely.
I was not on the ball this summer and didn’t take many photos of the space. Luckily, our photographer from our East Coast Living shoot, graciously provided us with the ones he took. I’m so happy to have them!


When I look back at the photos from the beginning here, here, here and here, it’s now neat to see how it has changed. The plants and flowers have grown full and lush, the deck, walls and fence have been stained in rich brown tones and our grass is healthy and green.

That’s the fun part of blogging. Being able to go back and look at where your projects started, the process, the finished product and how they evolve over time.
Come back tomorrow and see how this whole space was transformed as the site of our wedding this past August!


Visit FreeRealtyOnline.com to list your home for sale by owner!